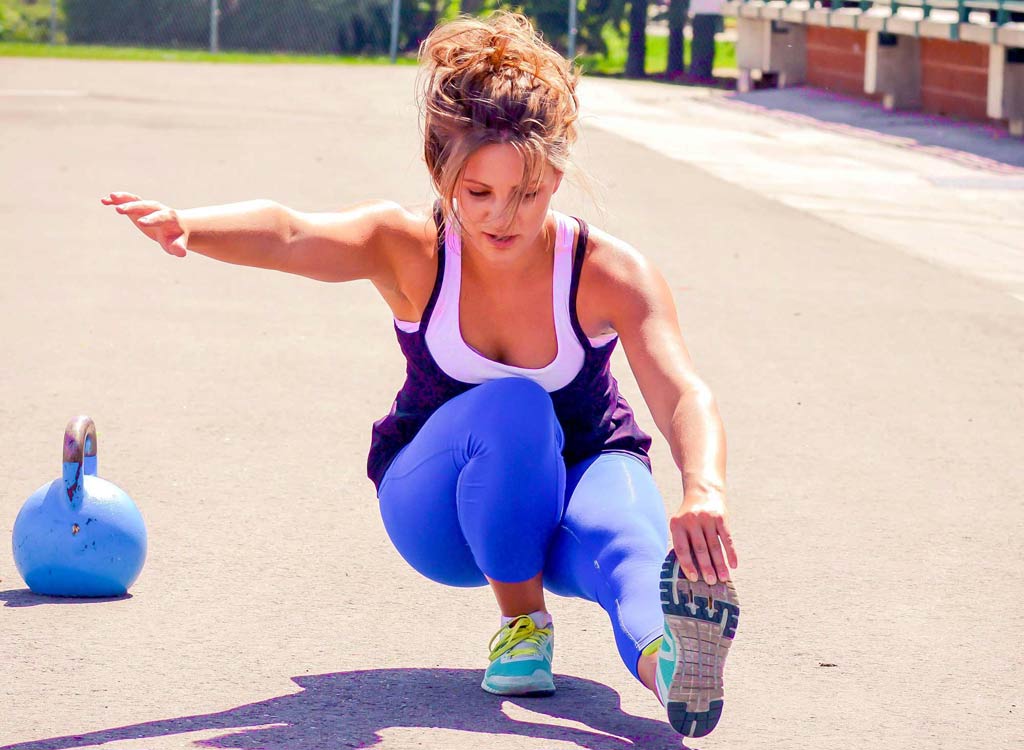
Learning how to do a pistol squat is a difficult but satisfying challenge.
The pistol squat is the Queen Mother of all lower body bodyweight calisthenics moves. It requires amazing strength, coordination and mobility, and most of us can’t master this move without some effort. Is it worth it? Hells to the yeah. It works your lower body like crazy, especially your glutes. If you’re doing calisthenics or bodyweight training, it’s one of the few lower body moves that is challenging without involving plyometrics.
The best part? Skill-building can be a huge motivation in strength training. It gives you something concrete to work towards, rather than just completing reps or increasing your heart rate. Plus, it’s really cool to learn something new with your body. Remember being a kid and learning cartwheels or how to throw a ball? It’s fun and exciting, keeps your body and mind young, and you’ll get much, MUCH better results.
What is the pistol squat?
This post may contain affiliate links. Please see my full disclosure here.
In brief, a full pistol squat is a squat on one leg that lowers all the way down to the ground until your butt rests on your ankle, with the other leg out in front (like the barrel of a pistol), and then returns all the way back to the standing position.
There are other squats on one leg that are not the pistol squat: one-legged squat (or half pistol), shrimp squat, one-legged jump-up and one-legged chair squat. I’ll get into these later, as they are all great exercises in their own right, and can be of use when training to learn the full pistol squat.
Why you should learn how to do a pistol squat.
There are loads of benefits to being able to do a pistol squat:
- Targets the glutes well (and the quads).
- Strengthens the knees.
- Helps aid balance and agility.
- Is a fantastic lower body exercise you can do anywhere.
- Gives you bragging rights.
Some stay away from pistol squats because of a concern for damaging the knees. However, I’ve known people who were able to fix knee issues once they learned how to do a pistol squat in proper progression.
It’s a tough exercise, but the benefits of learning how to do a pistol squat, a one-legged squat, or any other variation, is worth it.
What you need before you can master a pistol squat.
This is a difficult exercise, and may take some practice and coordination, not to mention mobility and balance to get it right. That’s okay! In fact, that’s great. Doing this exercise with assistance but correct form is much better than doing it fully and incorrectly.
If any of the below are not things you’re able to do, work on them first before diving in.
Ability to do a basic squat in proper form.
Before you attempt this squat, make sure you have mastered how to do a proper squat. Proper alignment is a must in a regular two-legged squat, but it’s mandatory here if you don’t want to wreck your knees.
Ability to do a full (butt to ankles) squat with your legs relatively close together.
Also make sure you are able to do a full squat, all the way down, with your butt on your ankles. Even better, you want to be able to do a full squat with your legs relatively close together (not out to the sides). This requires mobility, especially in your ankles. Which brings me to…
Ankle mobility.
If your heels can’t stay on the ground in this bottom position, work on ankle mobility and just do the squat as far down as you can go before your heels lose contact with the ground. Here is one great resource for exercises and info on getting your ankles flexible enough. Do a search and you’ll find many more, like this video of Kelly Starrett’s.
Healthy knees.
Many of us have knee injuries (me included), so if you feel pain or discomfort in your knees when squatting, please stop. Do the exercise as far as you are able to while pain-free. If you hear lots of pops and crackles in your knees, warm up your knees by doing bodyweight squats and lunges. Be good to your knees! If you have knee pain and want to learn how to do the full pistol squat, please do so with caution, using the modification tools listed below. This exercise can be great for strengthening your knees in some cases, but if you have an injury, old or new, I suggest staying away from the full pistol squat. You can still get amazing benefits from the half pistol.
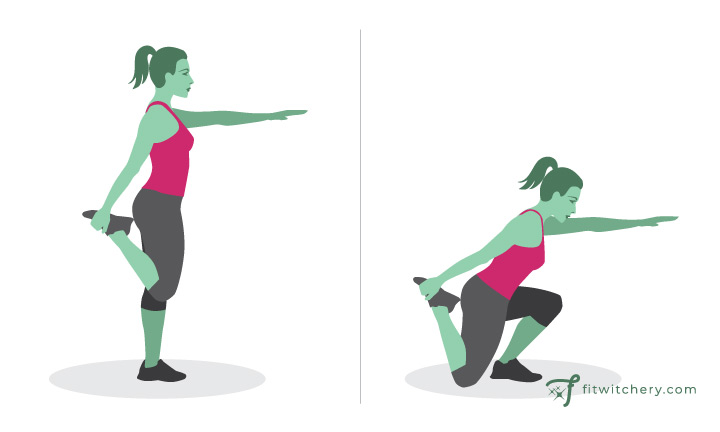
Hamstring flexibility.
You need to have enough flexibility in your hamstrings to be in the bottom position and have your other leg out in front of you and off the floor. You can test this by just placing your body in the bottom position. Go into a full squat and lift one leg and stick it out straight in front. Can your hamstrings handle it? If not, do hamstring stretches and practice instead with elevated pistol squats until you’re able to move to the ground.
Also, I want to note that while your back should always be straight in a regular two-legged squat, your back will likely be rounded for this exercise, especially the further down you go. It’s probably unavoidable. However, keep mindful of not slumping forward, and keeping your back still as flat as possible.
How to do the pistol squat.
Because it’s a complicated move, I’m going to break it into two specific steps: standing to thighs parallel, and thighs parallel to the ground.
The first “half” is really more than half. This is only the version of the one-legged squat that I do, and it still manages to kick my butt (literally) every time. You still get most of the strength benefits of the pistol squat this way, but you don’t have to upset injured knees or immobile ankles, which is my issue.
If you don’t have any injuries or issues, I strongly recommend learning how to do the full pistol squat.
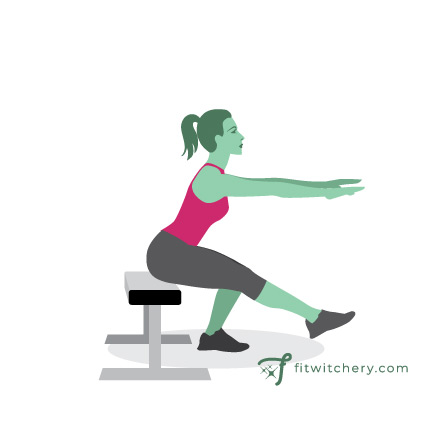
First half: standing to thighs parallel.
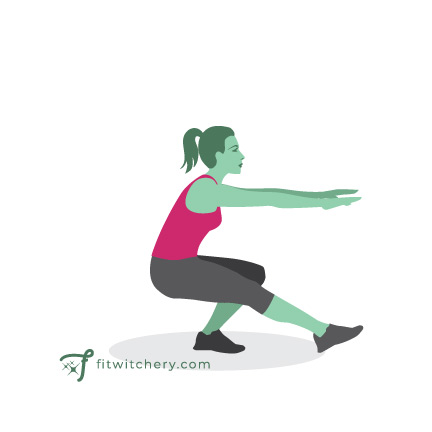
Stand up on one leg, with the other out in front, straight or with a slight bend. Put your arms out straight in front of you for balance. Lower yourself by bending at the hips and pushing your hips backward. Never bend at the knees first. Your knees should not go past your toes at this point, and most of your weight should be pushing through your heel. This move does require balance, so occasionally you will feel your weight shift forward. Just naturally adjust back through your heel as you regain balance. Continue down in a controlled manner—don’t let go and drop all the way down, at least not at this point. You should feel this working your glutes (butt, tush, bum, buttocks, backside, whatever word you prefer) as you get to the point where your thigh is parallel with the ground.
Congratulations! You have now done a half pistol squat, or what I just call simply a “one-legged squat.” If you have issues with ankle mobility or knees, come back up in a controlled manner, exactly as you came down. This is an excellent exercise, and still a killer for the glutes.
If you can go further down, read on.
Second half: from parallel to the ground.
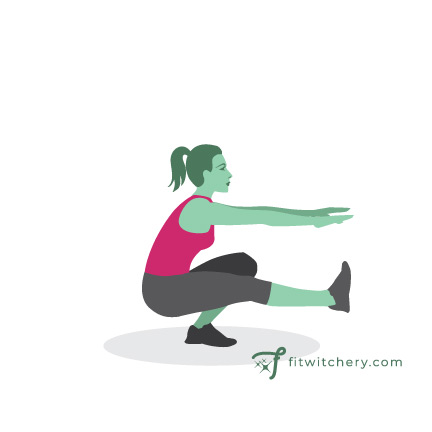
This is the point where you need really good balance and mobility, and you need to be pain-free in all relevant joints. You’re going to continue lowering down, and as your balance shifts, your knees will likely go a little past your toes—that’s fine. You also will at some point collapse into the bottom position, but try to stay in control as long as possible. If you can get to this point, then the bottom should be pretty easy. The hard part is coming back up. Reverse the movement, keeping good form as you did on the way down, and return to standing. That’s one rep.
Modifications to the pistol squat.
Most likely, you’ll need to practice other forms of the pistol squat until you can do the full thing. Jump on in and enjoy the journey. I’m listing all the modifications here, and later I’ll lay out a sensible progression.
One-legged box squat.
Get a box, ledge or chair that’s regular chair height, about 18 inches. Sit down, back straight. Go up to standing on one leg from here, holding your arms out straight in front for balance. Your other leg should naturally be held a little in front. From standing, sit back down on the chair from the one-legged position.
This move is great for building enough strength and agility on one leg to lift and lower yourself. It’s also great for reminding you to bend at the hips first.
One-legged chair squat.
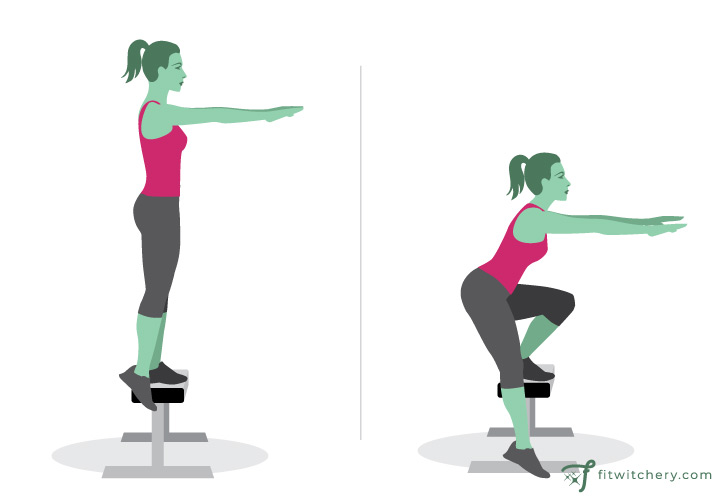
Stand on a chair (or something comparable) on one leg with the other leg dangling down off the side. Lower down on that one leg, following the same form as illustrated in the regular pistol squat, first half. This will be easier because the other leg is pointing down and not in front, so balance is easier to maintain. You also shouldn’t have the rounding of the lower back you get with the half pistol. Stop when your thigh is parallel to the ground. Your dangling foot will likely be touching the ground at this point.
If you can, come straight back up without shifting your weight on to the dangling foot. If you need to, however, you can do a slight hoist up from the ground to get you moving upward. Be aware when you no longer need help, however.
Assisted pistol squat using a chair.
This works well when you still need assistance on the first half of the squat. Put a hand on a horizontal bar or back of a chair, using it for balance or assistance. Stop at the midway point, and come up.
When holding something for balance or a weight assist, it works best when you employ it only when needed. Don’t lean on the chair if you don’t need to. Do the move until you can’t, then use the assistance to get you through the rough patch, and let go when you don’t need it anymore.
Assisted pistol squat using a pole or banister.
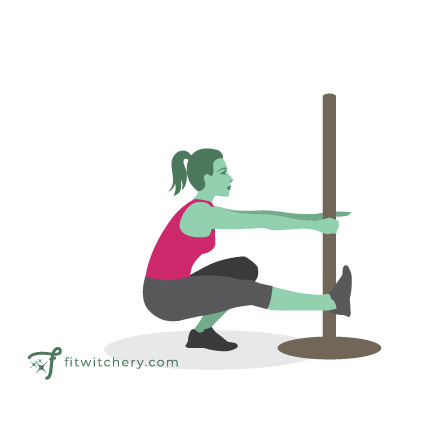
This is similar to the chair, but this helps more when you are going all the way down. The assistance will help you from falling backward.
Find a pole, doorway, banister, piece of furniture or anything that’s vertical and able to be gripped and hold your weight leaning backward. Do the squat in the proper form right, following the instructions above. When you get to a point where you are having balance issues, grab the pole/doorway/banister just enough to help you through the rough spot, and let go when you have control again. Like the chair assist, only use the assistance at the points that you need it. Remember, you won’t progress if you don’t allow yourself out of your comfort zone.
Rollback pistol squat.
There are two ways to do this, but they both are the most helpful on the bottom half (second half) of the pistol squat. The first way is by squatting down on both legs all the way. When you are close to the bottom, don’t stop, but drop your butt to the ground and roll backward. Roll back on to your butt and then use the momentum to continue up on to one leg, and come up. This helps you gain the balance, coordination and strength needed to come up from the bottom of a full pistol squat.
The second way to do this is more advanced, and works well for people who can almost do a full pistol but can’t quite come up from the bottom position without help. This gives you a bit of momentum to get up and moving, building the muscles you eventually need to come up on your own.
Do the full pistol squat as instructed above, but when you get close to the bottom, instead of dropping your butt onto your ankles, drop it all the way to the ground, roll back and reverse the roll, coming up on the same leg, continuing upwards as described above.
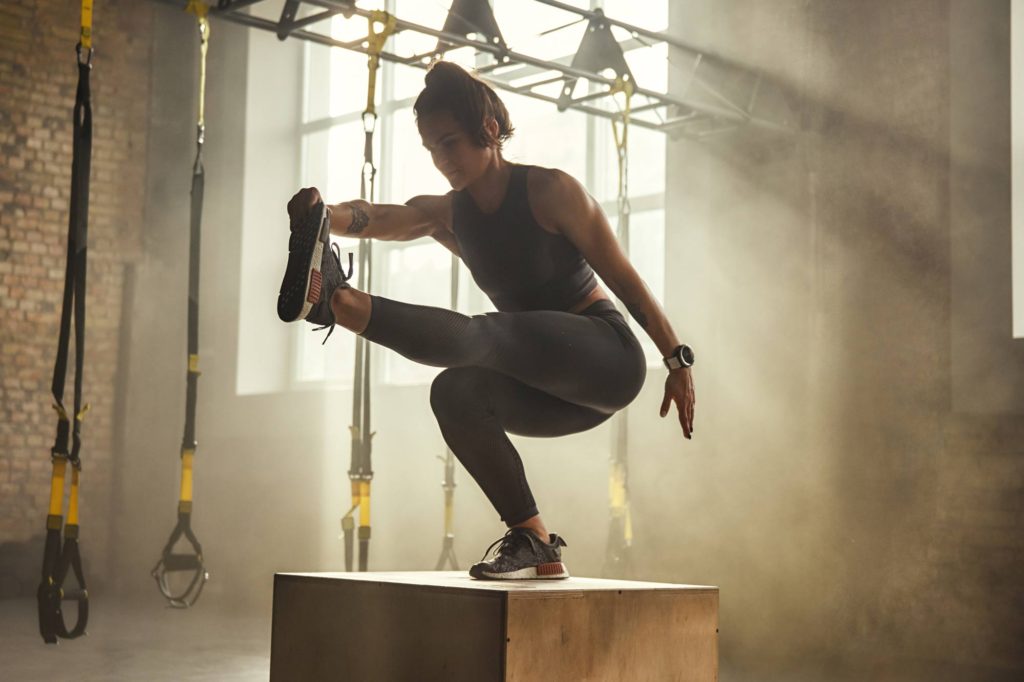
Elevated pistol squat.
This is similar to the one-legged chair squat except that you will be going all the way down, and you will be attempting to hold your foot in front, with the ability to drop it down if needed. It gives you extra options for those still struggling a bit with balance or hamstring flexibility.
Follow the instructions for a full pistol squat, but perform it on an elevated surface.
Pistol squat progression.
Looking at the alternatives in the section above, a great progression that works for many is:
- One-legged box squat.
- One-legged half squat with assistance.
- One-legged chair squat.
- Rollback from two-legged squat to one-legged on the way up.
- Rollback pistol squat (one-legged down and up).
- Elevated pistol squat.
- Full pistol squat will pole/banister assistance.
- Full pistol squat.
Feel free to adjust to what works for you! You can skip any of the steps above, or add in extra exercises that you need.
Super alternatives to the pistol squat.
If you’re limited by injury, strength, coordination, balance, flexibility or mobility, permanently or temporarily, have no fear! There are excellent options that still give you a killer burn.
One-legged squat.
Do the first half of the pistol squat, coming back up after your thigh hits the horizontal mark (or close to it).
One-legged squat with hold.
Do the one-legged squat, but when you hit the bottom point (thigh parallel with the ground), hold for a beat (or two, or three) and come back up. Stopping the momentum means you need a little extra strength to get moving upwards again.
One-legged squat with pulse.
Do the one-legged squat and do a pulse when you’re at the bottom (parallel) position. Then return up.
Raeburn (step-up and one-legged chair squat).

You’re going to do a step-up onto a chair, box or platform. Once up, do a one-legged chair squat. Step back on to the ground. Ideally, for this, you need a corner, so you can step from behind up on to the chair, and then dip your leg off the side. When you come down, you can leave your foot up on the chair; just shift your weight back to the floor leg before continuing to the next rep.
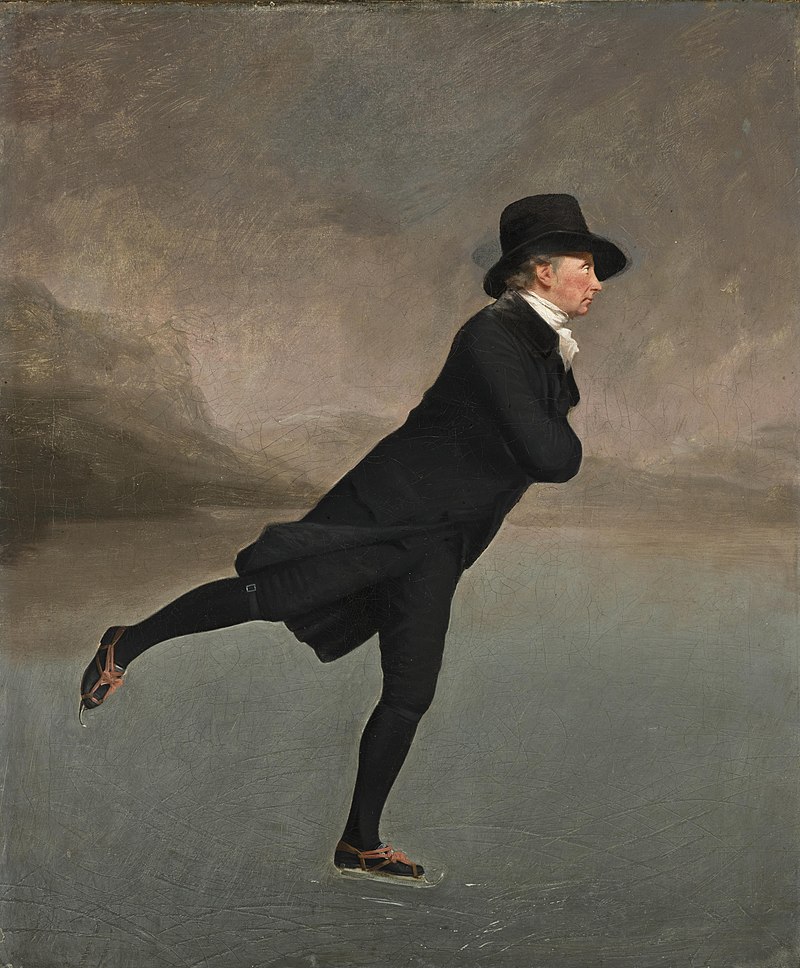
FYI, I named this exercise a Raeburn after a painting I saw at a museum. It’s called The Skating Minister by Henry Raeburn:
This exercise doesn’t quite do the same motion, but it reminded me of it. I use this combination exercise a lot in bodyweight training and needed an easier name than “step-up and one-legged chair squat” to write in my notebook. (You might have noticed I love museums and like naming exercises and workouts after pieces I love.)
Shrimp squat.
This is a one-legged squat where your other leg is bent and held behind you, like a hamstring stretch. It’s easier in some ways—you’re not going all the way down, the other leg doesn’t have to be held up or have the flexibility in the hamstring—but it’s more difficult in the sense that you don’t have the other leg to counter-weight your body.
One-legged jump-up.
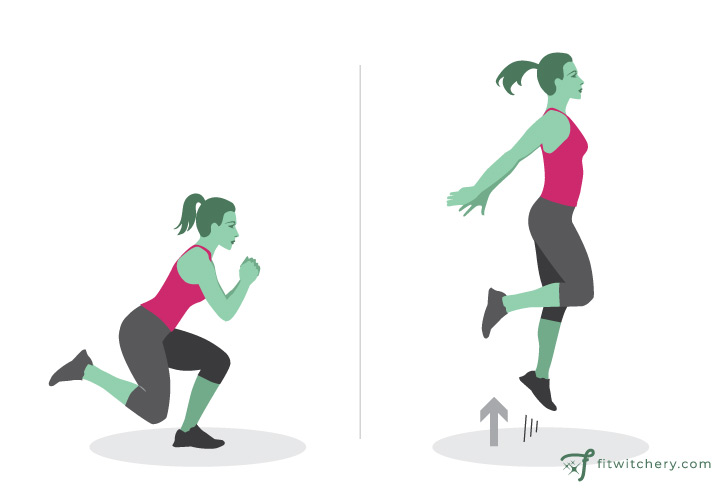
This is a jumping one-legged squat. From standing, bend down on one leg, the other leg bent and tucked underneath you. You’re going to spring up, so bend your torso down a bit, too. Jump up from the contracted position, straightening your body and arms, then come back down to the contracted position, with your thighs parallel to the ground, or close to it. Come up.
You can come up between reps on this, as I do, or go right into the next rep immediately. I find that coming up helps me keep my form controlled.
Now, get out there and do those pistols!
When I first started doing one-legged squats, I couldn’t stand them, but that was because I couldn’t do them properly. Once I made it my mission to learn it, I stopped being frustrated because I had a plan to get where I wanted to go.
And once I had a plan, each time I graduated to a new progression, I felt like I had really accomplished something. Even better, I could incorporate this amazing move into my calisthenics training, skyrocketing my fat-burning and muscle building potential.
And hey, don’t just take my word for it.
This move will seriously sculpt your butt and thighs with zero equipment needed. It tests your agility, makes you more mobile, builds muscle, burns fat, and earns you serious bragging rights.
Related pistol squat and calisthenics posts:
- Why Calisthenics Should Always Be a Part of Your Workout Program
- 11 Ways to Make Exercises Harder (Without Adding Weight)
- This Lower Body Calisthenics Workout Will Leave You Breathless
- Learn to Do a Pull-Up (Yes, It’s Possible)
- This 35 Minute HIIT Workout Will Make You Fall in Love With Bodyweight